


Have you seen vibrant expressions when intricate paper shapes pop out? Making unique gifts brings joy and doesn’t need expert skills. You’ll make your family happy with handmade art using this easy guide.
This tutorial shows how easy it is to make special memories together. It offers clear paths for creative fun. We’ll teach you how to make a pop up card for kids in simple steps.
Making 3D art strengthens family bonds. Surprise kids with custom cards using this simple method. Every step is designed to help you succeed.
Get ready to create something amazing with simple things from home. Your creative adventure begins here with tried methods. Let your imagination run wild as we make these magical paper creations.
Start exploring artistic possibilities and new designs together. These fun activities let you express yourself with colorful paper. Each fold tells special stories that everyone will love.
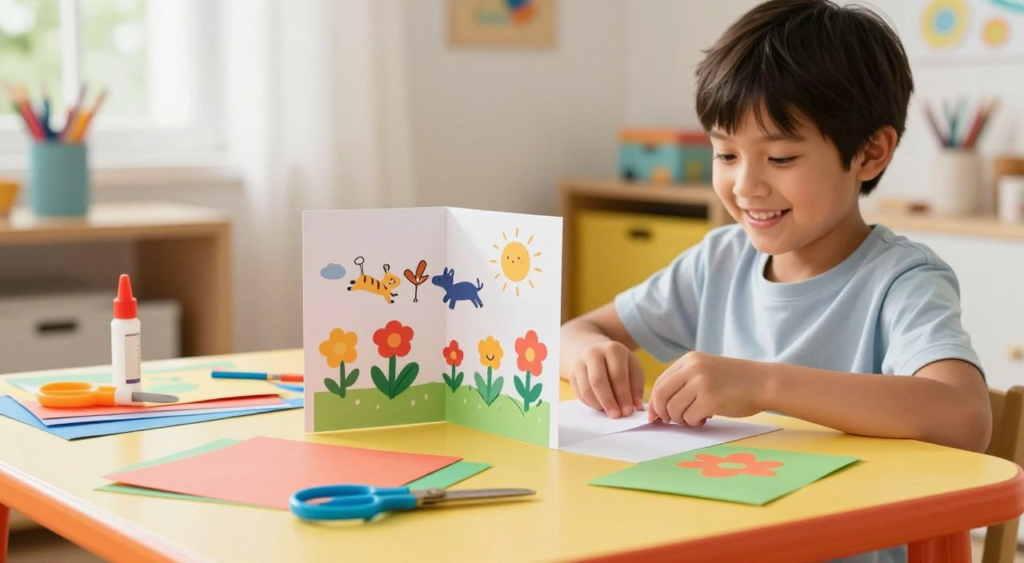
Why Pop Up Cards Make the Perfect Kids Craft Project
Pop-up cards can create a magical world for kids. They are not just fun, but also good for kids. They help kids learn and be creative.
Building Fine Motor Skills Through Card Making
Pop-up cards help kids get better at using their hands. They need to cut, fold, and glue. This makes their hands stronger and better at moving.
Encouraging Creativity and Self-Expression
Pop-up cards let kids show their creativity. They can use many colors and shapes. This helps kids feel good about themselves.
Creating Meaningful Handmade Gifts
Pop-up cards make great gifts. Kids can make them for birthdays or holidays. The effort they put in makes the gift special.
| Benefits of Pop-Up Cards | Description |
|---|---|
| Fine Motor Skills | Improves dexterity and hand-eye coordination through cutting, folding, and gluing. |
| Creativity and Self-Expression | Fosters imagination and confidence through personalized designs. |
| Meaningful GiftsCreates thoughtful, handmade gifts for special occasions. |
Making pop-up cards is fun and good for kids. It helps them learn and be creative. So, let’s get started and make some cards with our kids!
Gathering Your Pop Up Card Materials and Supplies
Before starting your pop-up card, get the right stuff. Making a pop-up card is fun for kids. Having the right supplies makes it smoother and more fun.
Essential Paper and Card Stock
The base of your card is the paper or card stock. Choose colors you like. For a sturdy card, pick a heavier card stock.
Try different textures and patterns. This adds fun to your card.
Adhesives That Work Best for Kids
For adhesives, glue sticks are great. They’re easy to use and dry fast. White glue works too, but watch out for messes.
Coloring and Decorating Supplies
For color and fun, use crayons, markers, and paint. Stickers and washi tape add cool touches.
Basic Tools You Already Have at Home
You likely have what you need at home. A ruler, scissors, and edging scissors are key. A pencil or marker helps with folds and cuts.
With these materials, you’re ready to make your own pop-up cards. Enjoy making them with your kids.
Setting Up Your Card-Making Workspace
Before you start making your pop-up card, set up a workspace that helps you be creative and productive. A good workspace makes card-making fun and easy for kids.
Organizing Materials for Easy Access
First, get all your materials ready and put them where you can easily find them. This includes paper, glue, scissors, and any decorations you want to use. Organizing your materials in labeled containers or trays keeps your space neat. It also helps kids find what they need quickly.
- Sort supplies into categories (e.g., cutting tools, adhesives, coloring supplies).
- Use small containers or bags to store small items like buttons or beads.
- Keep things you use a lot in places that are easy to get to.
Protecting Your Work Surface
It’s important to protect your work surface from glue, scissors, and other tools. Cover your work surface with a plastic tablecloth, newspaper, or a silicone mat. This makes cleaning up easier and keeps your furniture safe.
Creating a Comfortable Crafting Environment
Make sure your workspace is comfy and well-lit. Good lighting is key for detailed work like cutting and gluing. Encourage kids to take breaks if they’re tired or upset. A comfy space can really help their crafting experience.
How to Make a Pop Up Card for Kids: Basic Folding Technique


To make a pop-up card for kids, you need to learn a basic folding trick. This trick is the key to making the card pop. It’s simpler than you might think.
Folding Your Base Card Correctly
First, fold your base card right. Cut two pieces of paper to the right size. For example, cut the outside paper to 8.5 x 6 inches and the inside to 8 x 5.5 inches.
Then, fold the bigger piece of paper in half. Make sure the edges line up perfectly. This fold is key for the card’s shape.
Understanding the Pop Up Mechanism
The pop-up mechanism is what makes your card special. It’s made of folds and cuts that let the card open and close smoothly. It also shows a 3D element.
Creating the Pop Up Tabs
To make the pop-up tabs, cut and fold small pieces of paper. These tabs will pop up when you open the card. You can make them any size or shape you like.
| Tab Size | Cutting Dimension | Folding Style |
|---|---|---|
| Small | 1 x 2 inches | Simple Fold |
| Medium | 1.5 x 3 inches | Accordion Fold |
| Large | 2 x 4 inches | Double Fold |
Making Precise Cuts and Folds
It’s important to make precise cuts and folds. Use a ruler to help guide your cuts. Take your time to make sharp, crisp folds.
Learning the basic folding technique and making pop-up tabs will help you make a great pop-up card for kids.
Step-by-Step Instructions for Your First Pop Up Element
Now that you have your materials ready, let’s start making your first pop-up element. This easy DIY pop-up card tutorial will guide you.
Creating a pop-up element is fun and rewarding. You’ll measure, cut, fold, and test your way to a delightful card.
Measuring and Marking Your Pop Up Pieces
Begin by folding a sheet of paper in half lengthwise. Draw four lines on the middle crease. The lines should be 4 cm, 3 cm, 2 cm, and 1 cm long. This step is key to your pop-up’s size and layers.
Cutting the Pop Up Strips
Now, cut along the lines you drew. Make sure your cuts are precise to avoid rough edges.
| Strip Length | Number of Strips |
|---|---|
| 4 cm | 1 |
| 3 cm | 1 |
| 2 cm | 1 |
| 1 cm | 1 |
Folding the Tabs Inward
Fold the tabs of your cut strips inward. This step creates the pop-up mechanism. Make sure your folds are crisp and sharp.
“The art of creating a pop-up card lies in the details and the patience you put into making it.”
Testing Before Gluing
Test your pop-up element before gluing. Fold and unfold it a few times. This checks its mechanism and allows for adjustments.
By following these steps, you’ll have a beautiful pop-up element ready for your card. Remember, practice makes perfect. Don’t worry if it’s not perfect the first time.
Gluing and Attaching Your Pop Up Feature

Gluing the pop-up element needs care and patience. You’ve made your pop-up pieces with love. Now, it’s time to attach them to the card.
Applying the Right Amount of Glue
Using the right glue amount is key. Too little won’t hold, and too much can mess up the paper. Use a small, even amount of glue on the tabs or special areas.
Positioning Your Pop Up Element Perfectly
Before gluing, place the pop-up on the card to check its spot. Make sure it’s aligned with the card’s edges or designs. Then, you can glue it down.
Pressing and Drying Techniques
After gluing, press the pop-up gently to make sure it sticks. Use a tool like a bone folder to press without harming the card. Wait for the glue to dry before you handle the card a lot.
Checking That Everything Works Smoothly
After the glue dries, test the card by opening and closing it. Make sure the pop-up works right and the card closes flat. If not, adjust the glue or the pop-up’s spot.
| Common Issues | Solutions |
|---|---|
| Pop-up element not sticking | Apply a bit more glue or use a stronger adhesive. |
| Card doesn’t close flat | Adjust the pop-up element’s position or reduce the amount of glue used. |
| Pop-up element is crooked | Re-glue the element, ensuring it’s properly aligned. |
Lastly, glue the middle insert to the outside color (blue sides) with glue. Your beautiful, handmade card will make someone’s day.
Creative Pop Up Card Designs Kids Will Love
Explore a world of creative pop-up card ideas that kids will adore making and sharing. Pop-up cards are more than a fun craft. They help kids grow their creativity and fine motor skills. With a bit of imagination, kids can make cards for any occasion or theme.
Simple Birthday Cake Pop Up Card
A birthday cake pop-up card is a joy to make. Kids can build a 3D cake with candles that pop up. It’s a delightful gift for birthdays and a fun craft project.
Cute Animal Pop Ups for Any Occasion
Animal-themed pop-up cards are a hit with kids. They can make simple animals like cats and dogs or more complex ones like rabbits or birds. These cards are great for birthdays, get-well wishes, or just because.
Flower and Garden Theme Cards
Kids can make flower and garden theme pop-up cards. They can make flowers bloom when the card opens. It’s a lovely surprise for spring or summer.
Holiday and Seasonal Pop Up Ideas
Pop-up cards can celebrate holidays and seasons. Kids can make Christmas trees, Halloween ghosts, or Easter bunnies. It’s a thoughtful handmade gift for any special time.
Customizing Designs for Recipients
One great thing about pop-up cards is customizing them. Kids can make designs based on their friends’ or family’s interests. It makes the gift even more special and personal.
Exploring creative pop-up card ideas is a fun and rewarding craft. It encourages kids to be creative and express themselves through art. Whether for a special occasion or just for fun, pop-up cards are a wonderful way for kids to show their creativity.
Decorating and Personalizing Your Pop Up Card

Decorating your pop-up card lets you show off your creativity. It turns a simple card into a handmade card activity for kids that’s special.
You have many tools to decorate with. Crayons, markers, and paint add color and fun to your card.
Adding Colors with Crayons, Markers, and Paint
Crayons, markers, and paint make your card colorful. You can draw a birthday cake with markers and add stickers for fun. Crayons are great for drawing balloons to celebrate.
Here are some tips for using these tools:
- Use bright colors to make your pop-up pop.
- Blend colors for a special shade.
- Try different textures with paint or markers.
Using Stickers and Washi Tape
Stickers and washi tape are fun for decorating. They come in many designs and add details or patterns.
For example, stickers can make a themed background. Washi tape can frame your pop-up elements.
Creating Backgrounds and Scenes
Adding a background or scene makes your card more interesting. You can draw a simple background or create a detailed scene with cut-outs.
Writing Heartfelt Messages Inside
Don’t forget to write a heartfelt message inside. This makes your card truly special and personal. For a birthday card, write “Happy Birthday” and a personal message.
By decorating with these tips, you can make a unique and personalized pop-up card. Kids will love it.
Fixing Common Pop Up Card Mistakes
Mistakes can happen when making pop-up cards for kids. But, most problems can be fixed easily with a few tweaks.
What to Do When the Card Won’t Close Flat
If your card won’t close flat, it might be because the pop-up is too tall. Or maybe the tabs aren’t folded right. Try making the pop-up shorter or folding the tabs again to fix it.
Repairing Pop Up Elements That Come Loose
If a pop-up piece comes loose, you can fix it with a bit of glue. Just be careful not to make a mess.
Handling Torn Paper and Cutting Errors
Fix torn paper by gluing it back together. Or use tape to hide mistakes. For cutting errors, you can change the design or use it as is.
Adjusting Uneven or Crooked Pop Ups
Uneven or crooked pop-ups can be fixed. Just re-measure and re-cut the pieces. Double-check your measurements before you cut.
| Common Mistake | Solution |
|---|---|
| Card won’t close flat | Adjust pop-up height or re-fold tabs |
| Loose pop-up elements | Reattach with a small amount of glue |
| Torn paper or cutting errors | Glue torn pieces or use tape to cover |
| Uneven or crooked pop-ups | Re-measure and re-cut pieces |
Age-Appropriate Tips for Different Skill Levels

Making pop-up cards is fun for kids of all ages. You can make it easy or hard, depending on their skill level. This way, everyone can have a good time and learn something new.
Simplified Versions for Preschoolers
For little kids, keep it simple. Use big pieces of paper and pre-cut shapes. Use washable glue and crayons to keep things clean and fun. Make a simple design with easy folds and cuts.
Projects for Elementary School Children
Older kids can try harder designs. Teach them new folding tricks and let them play with colors and shapes. Encourage creativity with fun materials like stickers and washi tape.
Supervision Guidelines and Safety Reminders
Always watch kids when they use sharp things like scissors. Teach them to use scissors safely. Here are some safety tips:
- Always supervise children when they’re using scissors or other sharp objects.
- Teach children how to hold scissors correctly and cut safely.
- Use child-friendly scissors with blunt tips for younger children.
Making the Activity Enjoyable for Everyone
To make it fun for all, be ready to change things up. Encourage teamwork by pairing kids with different skills. Turn it into a race to see who can make the best card first.
Advanced Pop Up Card Techniques to Try Next
Now that you know the basics of making pop-up cards, it’s time to try harder designs. You can learn new tricks to make your cards even better.
Creating Multiple Pop Up Layers
Adding layers to your pop-up cards can make them look even more amazing. You’ll need to plan and measure carefully. This way, each layer fits right and works well together.
Adding Pull Tabs and Moving Parts
Adding pull tabs and moving parts is another cool trick. It lets the person holding the card make things move. You can use paper, glue, and scissors to make these fun parts.
Designing Complex Scenes and Stories
You can tell stories with your pop-up cards by adding lots of details. Create a scene and add characters that pop up. Make sure it’s fun to look at and easy to use.
Combining Different Pop Up Mechanisms
Try mixing different pop-up ways to make something really special. Use V-fold, box-fold, and angle-fold to make something unique. This shows off your creativity and skill.
Conclusion
You’ve learned how to make easy pop up card designs. This opens a world of creativity. Making something special for loved ones is very rewarding.
Every fold, cut, and glue application brings your ideas to life. You’ll find new ways to express yourself and make gifts. The skills you’ve learned will help you make beautiful cards for birthdays and holidays.
The magic is in the making, not just the final card. Crafting is a chance to bond with family and friends. So, keep trying new designs and enjoy the happiness it brings.
FAQ
What is the best paper to use for a diy pop up card tutorial?
For the best results, use a sturdy cardstock like Astrobrights for the base. For the internal pop-up elements, lighter construction paper or heavy printer paper works well because it is easier for kids to fold and manipulate.
How can I find more easy pop up card designs for beginners?
You can start with simple geometric shapes like boxes or triangles. Many creative pop up card ideas begin with a single central tab which can then be decorated as a cake, a flower, or a favorite animal character.
Are there specific fun kids craft projects that help with school skills?
Yes! Making pop-up cards is one of the top handmade card activities for kids because it combines math (measuring), science (mechanics), and art. It helps develop the fine motor skills needed for neat handwriting.
Can you provide a quick step-by-step pop up card guide for the “box” fold?
Certain! Fold your base card in half. On the folded edge, cut two parallel slits. Fold the flap created by the slits upward and crease it. Open the card and push the flap through to the inside so it stands up when the card is open. Glue your decoration to the front of that flap.
What are some pop up card instructions for children who struggle with scissors?
For younger children, an adult can handle the “parallel slit” cutting. The child can then participate in the “pop-out” folding and the decoration phase. Using Crayola markers and pre-cut stickers is a great way to keep them involved without the frustration of complex cutting.
How do I ensure my handmade card stays flat when closed?
The key is to make sure your pop-up element isn’t taller than the distance from the tab to the edge of the card. Always do a “test fold” before the glue dries to make sure nothing is peeking out of the sides or top.