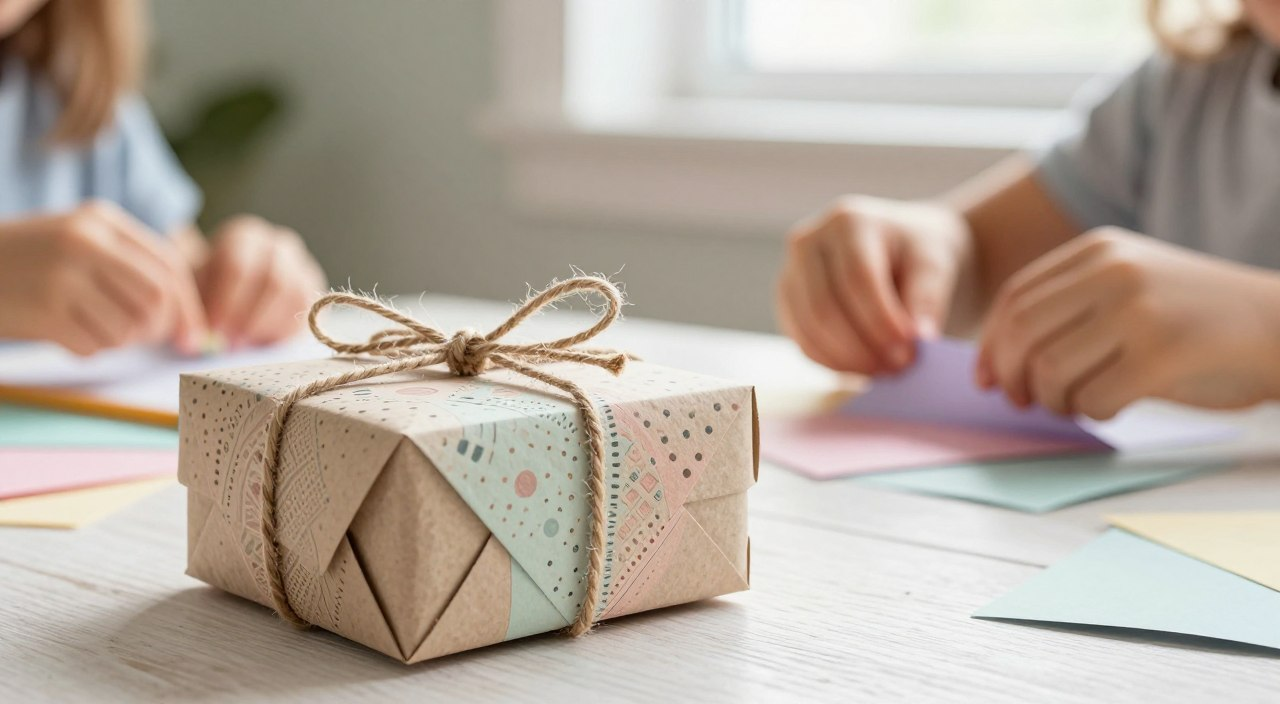
When you give a gift, the box matters as much as what’s inside. You can make something beautiful from a simple sheet with a few folds. Our guide will help you make a project that looks great and feels personal for your friends.
We have a simple design that kids can do easily. This small template is great for kids to practice cutting and folding on a rainy day. It makes a quiet day fun and helps the whole family learn and imagine together.
Key Takeaways:
- Personalizing your packaging adds a unique and creative touch to every celebration.
- Using a kid-friendly template helps young crafters develop fine motor skills and confidence.
Making these items is a fun activity for any special day. By following our easy steps, you can make something special that anyone will love. Your loved ones will thank you for the extra effort you put into your gift.
Why Making Your Own Paper Gift Box Is Perfect for Kids
Making your own paper gift box is fun and teaches kids a lot. It boosts their creativity and helps with fine motor skills. Kids learn new things and solve problems when they make a creative paper box tutorial.
Experts say crafting, like making paper gift boxes, helps kids think better.
“Crafting is not just about creating something with your hands; it’s about developing critical thinking and creativity in children,” says Jane Smith, a renowned child development specialist.
Here are some benefits of making a paper craft gift box for kids:
- Enhances creativity and imagination
- Develops fine motor skills through cutting and folding
- Improves problem-solving abilities
- Boosts confidence through creation
| Skill Developed | Description |
|---|---|
| Creativity | Encourages children to think outside the box and explore different designs and patterns. |
| Fine Motor Skills | Cutting and folding paper helps improve dexterity and hand-eye coordination. |
| Problem-Solving | Assembling the gift box requires critical thinking and problem-solving skills. |
By making a DIY gift box, kids learn about measurements and geometry. They also learn to follow instructions. It’s a fun way to learn many things.
Parents and teachers can make it even more fun. They can help kids decorate their boxes with stickers, stamps, and markers. This lets kids add their own special touch and boosts their creativity.
Materials and Supplies You’ll Need

Before starting your DIY gift box, make sure you have the right stuff. Making a simple gift box is fun and creative. But, the right supplies are key to a great result.
Paper Options for Your Gift Box
The paper you pick for your gift box matters a lot. It affects how it looks and lasts. Here are some choices:
- Cardstock: It’s thick and strong, perfect for gift boxes.
- Patterned Paper: It adds a fun design to your box.
- Kraft Paper: It’s good for the planet and works well for boxes.
- Textured Paper: It gives your box a special feel and look.
Think about the event, who it’s for, and what you want it to look like.
Essential Tools and Supplies
To put your gift box together, you’ll need some basic tools and supplies. Here’s what you’ll need:
| Tool/Supply | Description |
|---|---|
| Scissors | For cutting out the gift box template |
| Glue or Adhesive | For assembling the box |
| Ruler or Cutting Mat | For precise cutting and scoring |
| Pencil or Scoring Tool | For marking fold lines |
Optional Decorative Materials
To make your gift box extra special, think about adding some extra touches. Here are some ideas:
- Stickers: They add fun designs and make it personal.
- Ribbons or Twine: They give a nice finish.
- Stamps or Ink Pads: They help you make cool designs.
- Other Embellishments: Like die-cuts, washi tape, or glitter.
These extras can make your gift box even more special.
Choosing the Right Template Size for Your Project

Choosing the right size for your homemade paper gift box is very important. The size you pick depends on what you plan to put in it. Think about what you want to use it for before you decide.
For small things like jewelry or candies, a small box is best. But, if you’re giving something bigger, you’ll need a larger box.
Small Box Dimensions and Uses
Small gift boxes are great for tiny treasures or treats. They’re perfect for:
- Jewelry or trinkets
- Candies or chocolates
- Small collectibles or figurines
Small boxes can be 2x2x1 inches to 4x4x2 inches. The size you pick depends on what you’re giving.
| Box Size (inches) | Ideal for |
|---|---|
| 2x2x1 | Small jewelry, candies |
| 3x3x1.5 | Trinkets, small collectibles |
| 4x4x2 | Small gifts, chocolates |
Printing and Preparing Your Template
After picking the right size, print and get ready your template. Use good paper for printing.
Make sure your printer settings are right to avoid mistakes. Use a ruler to check if it’s the right size.
After printing, prepare your template for cutting. You might need to score or just cut along the edges.
How to Create a DIY Gift Box from Paper: Step-by-Step Instructions

Now that you have your template ready, let’s start making your DIY gift box. This guide will show you how to do it, from printing to putting it all together.
Step 1: Print and Cut Out Your Template
First, print your template on the paper you picked. Use the best print settings for the best look. Then, cut out the template along the lines. You can use scissors or a craft knife, depending on what you like.
Step 2: Score the Fold Lines
Next, use a scoring tool or a craft knife to score the fold lines. Scoring makes the folds sharp and prevents the paper from tearing. Score on the inside of the box.
Step 3: Fold Along the Marked Lines
After scoring, fold along the lines. Start with the main folds and then the details. Make sure your folds are sharp and clean.
Step 4: Create the Box Base
The base of the box is important for its stability. Follow your template to make the base. Use glue or tape to hold it together. Make sure it’s sturdy and even.
Step 5: Assemble the Box Sides
With the base done, start on the sides. Fold up the sides as your template shows. Secure them with glue or tape. Make sure the corners are right for a neat look.
Step 6: Secure the Corners
The last step is to fix the corners. Use glue or tape to make sure they’re strong. Your DIY gift box is now ready to use or decorate.
| Step | Description | Tips |
|---|---|---|
| 1 | Print and cut out template | Use high-quality print settings |
| 2 | Score fold lines | Score on the inside of the box |
| 3 | Fold along marked lines | Make sharp, clean folds |
| 4 | Create box base | Ensure base is sturdy and even |
| 5 | Assemble box sides | Align corners properly |
| 6 | Secure corners | Use glue or tape for stability |
Making a Matching Lid for Your Paper Box

Making a lid for your paper box is easy and important. It keeps your box safe and makes it look nice. This makes your gift even more special.
Adjusting Template Measurements for the Lid
To make a lid that fits right, you need to change the template size. The lid template should be a bit bigger than the box base. Add a small margin to the box base size.
For example, if your box is 4 inches square, make the lid 4.5 inches square. This ensures a good fit. The exact size change depends on your paper and box design.
| Box Base Size | Lid Size | Margin Added |
|---|---|---|
| 4 inches | 4.5 inches | 0.25 inches |
| 5 inches | 5.5 inches | 0.25 inches |
| 6 inches | 6.5 inches | 0.25 inches |
Assembly Tips for a Perfect Fit
Putting the lid together needs care for a perfect fit. First, score the fold lines on your lid template. Then, fold along these lines to make a sharp crease.
Tip: Use a ruler or straightedge for sharp folds. This makes your box look better.
After making your lid, try it on your box. If it doesn’t fit right, adjust the size or folds. Keep trying until it fits perfectly.
Kid-Friendly Cutting and Folding Tips
Children can make their own beautiful paper gift boxes with the right help. This guide will show you how to make it fun and safe for them.
Safe Cutting Techniques for Children
Keeping safe is key when cutting. Kids should use child-safe scissors or craft knives with a grown-up nearby. It’s important to teach them how to hold things right and cut straight lines.
Here are some tips for safe cutting:
- Always watch kids when they use scissors or craft knives.
- Teach them to keep their fingers away from the blades.
- Use a cutting mat or other protective surface to prevent damage to work surfaces.
Making Clean, Crisp Folds
To get professional-looking results, making clean folds is key. Kids can use a bone folder or the blunt edge of a scissor blade to score and fold paper well.
Some tips for making clean folds include:
- Use a ruler or other straightedge to guide your fold.
- Score the paper before folding to make a crisp crease.
- Encourage kids to be patient and take their time when folding.
When to Ask for Adult Help
It’s good to encourage kids to do things on their own. But, there are times when they need help. If they’re having trouble with a cut or fold, or using a tool that needs a grown-up, it’s time to step in.
A table summarizing when to ask for adult help:
| Task | When to Ask for Help |
|---|---|
| Using scissors or craft knives | Always, for young or inexperienced kids. |
| Scoring or folding complex designs | If they’re having trouble with a clean fold or score. |
| Assembling the gift box | If they’re struggling to put the pieces together right. |
By following these tips, you can make sure your child’s DIY gift box project is fun and successful.
Creative Decoration Ideas for Your Handmade Box

Now that you’ve made your DIY gift box from paper, it’s time to make it special. You can add a personal touch that makes the gift even more meaningful. Let your imagination run wild with decoration ideas.
Painting and Coloring Techniques
You can use painting and coloring to make your gift box unique. Watercolor paints, acrylics, or markers can add colors and patterns. For a simple look, use one color or tone.
Adding Stickers, Stamps, and Embellishments
Stickers, stamps, and embellishments can add fun to your gift box. Use themed stickers or stamps to match the occasion. Ribbons, bows, or die-cuts can make it look more elaborate.
“The key to decorating a gift box is to not be afraid to experiment and try out different combinations of colors, patterns, and embellishments.”
Creating Themed Gift Boxes
Creating a themed gift box makes giving gifts special. Choose a theme based on the occasion or the recipient’s interests. For example, a book lover’s box can have literary-themed decorations.
| Theme | Decoration Ideas |
|---|---|
| Birthday | Colorful balloons, birthday-themed stickers |
| Book Lover | Literary-themed stamps, book page cutouts |
| Holiday | Seasonal colors, holiday-themed embellishments |
Personalization Ideas
Personalizing your gift box makes it extra special. Add the recipient’s name, a special message, or a meaningful quote. Using a marker or a stamp with their name is a thoughtful touch.
By using these decoration ideas, you can make your DIY gift box unique and meaningful.
Different Paper Box Styles You Can Try
When making handmade paper gift boxes, you can try many designs. This lets you make unique gifts for your loved ones.
The look of your gift box matters a lot. Let’s look at some popular styles you can make at home.
Square vs. Rectangular Boxes
First, you choose between a square or rectangular box. Square boxes are great for small, symmetrical gifts like jewelry. Rectangular boxes are better for longer or odd-shaped items.
You can change the size and shape of both types. This lets you match the box to the gift and the event.
Pillow Box Variation
A pillow box is a special kind of gift box. It has curved sides and looks like a pillow. This makes any gift look fancy.
Making a pillow box is easy and fun. You can decorate it in many ways. It’s perfect for special events or to wrap homemade treats.
Pyramid-Shaped Gift Box
The pyramid-shaped box is for those who like a challenge. It takes more time and skill to make. But it’s worth it.
This box looks amazing and makes a big impression. It’s great for gifts that mean a lot, like wedding favors or birthday presents.
Trying different box styles helps you get better at crafting. You can make simple or complex boxes. Your handmade paper gift boxes will always be special.
Troubleshooting Common Paper Box Problems
Troubleshooting is key when you’re doing DIY projects. Making a paper craft gift box is no different. You might run into some issues that can mess up your project. But, most problems can be fixed with a bit of knowledge.
Fixing Wobbly or Weak Corners
Wobbly or weak corners can make your box look bad. Make sure you score the fold lines right before you put the box together. Use a bone folder or a blunt tool to make a sharp fold. This makes the corners stronger.
If corners are weak, add a bit of glue or tape inside the box. This makes it stable without showing from the outside.
Dealing with Uneven Folds
Uneven folds can be a problem. Make sure your template is right and cut out well. If issues persist, use a ruler or straightedge to help cut.
For small fold mistakes, try fixing them as you put the box together. A bit of patience and careful handling can fix small problems.
What to Do If Your Box Won’t Close
If your box won’t close, it might be because of wrong measurements or too much stuff inside. First, check that you’ve measured right.
If it’s too tight, you might need to change the box or lid size. Try cutting the lid a bit bigger or adjust the box’s parts.
Creative Ways to Use Your DIY Paper Gift Boxes
Now you know how to make a simple gift box. It’s time to think of fun ways to use them. These boxes are great for both giving gifts and decorating.
Gift Giving Occasions
DIY paper gift boxes are perfect for many occasions. You can use them for:
- Birthdays and anniversaries
- Christmas and holiday gifts
- Wedding favors and baby showers
- Thank-you gifts and small gestures of appreciation
A handmade box makes your gift even more special.
Storage and Organization Ideas
But they’re not just for gifts. Your boxes can also be storage containers. Try using them to:
- Organize jewelry, beads, or small craft supplies
- Store desk supplies like paper clips, pushpins, or rubber bands
- Keep small mementos or memories tidy
Party Favors and Event Decorations
DIY paper gift boxes are also great for parties. You can fill them with treats or small gifts to be:
- Party favors for guests to take home
- Centerpieces or decorative elements for tables
- Unique packaging for homemade candies or snacks
Here’s a quick comparison of the different uses for your DIY paper gift boxes:
| Use Case | Description | Occasion |
|---|---|---|
| Gift Giving | Personalized gift boxes for special occasions | Birthdays, Christmas, Weddings |
| Storage | Organizing small items and supplies | Daily Use, Crafting |
| Party Favors | Filled boxes as treats for guests | Parties, Events, Celebrations |
Conclusion
Making a homemade paper gift box is fun and rewarding. You can do it with your kids. Our guide shows you how to make beautiful boxes for any occasion.
You’ve learned how to pick the right size, cut, and fold the paper. You also know how to decorate your box. These steps help you make a unique gift box that will wow your friends and family.
Now, it’s your turn to be creative. Start making your own paper gift boxes. Try different papers, colors, and decorations. Making paper gift boxes is a great way to have fun with your kids or to give special gifts.
FAQ
What is the best type of paper to use for a diy gift box from paper?
Use heavyweight cardstock (65lb to 80lb) for a sturdy box. Brands like Canson or American Crafts work well.
Is this simple gift box tutorial suitable for classroom projects?
Yes! It’s great for schools. Kids learn and create something special for holidays.
How can I make my easy paper box diy look more professional?
Use a bone folder for crisp, clean folds. Double-sided tape makes joints invisible. A high-quality ribbon from Offray adds a nice finish.
Where can I find a creative paper box tutorial for different shapes?
Most guides offer templates for various styles. Start with a square and try pillow boxes, pyramid-shaped gift boxes, or hexagons for a unique look.
What should I do if my lid doesn’t fit the paper craft gift box?
Make sure your lid is about 1/8th of an inch larger than the base. If it’s too tight, use thinner paper for the lid.
Can I use a Cricut machine for this diy gift box from paper?
Yes! A Cricut or Silhouette machine makes cutting and scoring easy. It’s great for making many boxes for party favors.
Are these boxes strong enough to hold heavy items?
Standard handmade paper gift boxes are best for lightweight items. For heavier items, use corrugated cardboard or double the cardstock layers.